Sistema wireless di cronometraggio con fotocellula per testare la velocità degli sci da fondo Speed Control System .
Questo nuovo prodotto è indicato per squadre o piccoli team. Lapparecchio speed controll rileva i tempi e trasmette tutti i tempi memorizzati, via radio a Speed Control trainer. Durante il test speed control trainer può raccogliere i tempi da 8 speed control diversi e visualizzare tutti i dati in modo immediato e preciso.
Questo facilita il lavoro di Equipe per selezionare sci più veloci e avere tutti dati centralizzati.
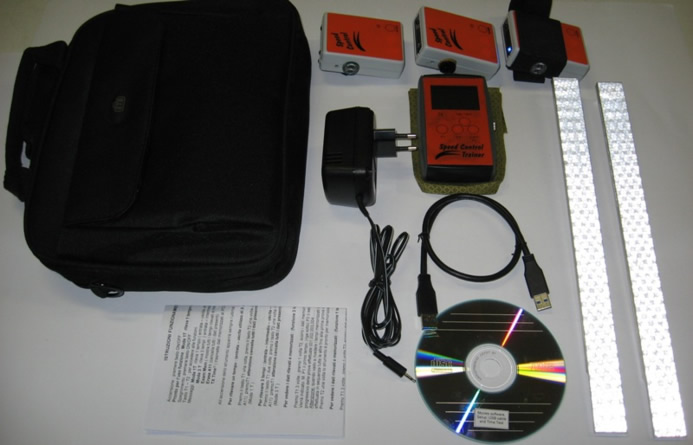
Per la vendita abbiamo previsto un kit composto da uno Speed Control Trainer abbinato a tre Speed Control a richiesta del cliente possiamo aumentare o diminuire la quantità di speed control .
Ogni Speed Control può essere programmato facilmente dallatleta con il suo nome.
Nomi, tempi, temperatura e velocità arrivano divisi per atleta sul display dello Speed Control TrainerTutti i dati possono essere scaricati su Pc
Software dedicato per analisi dati (condizione neve, tipo di cristallo, ultima nevicata,umidità, ecc) rilevati durante il test, creando un data base completo, aggiornabile, e da consultare in ogni momento.
We have developed a new wireless time keeping system with a photocell to test the speed of “Speed Control System” cross-country skis. This new product is intended for teams or small teams.
“Speed control” equipment reveals times and sends all stored times to “Speed controll trainer”. During “speed control trainer” tests, times can be collected from 8 different “speed controll” and displays all data instantly and accurately.
This allows Equipe to select the fastest skis and facilitates centralised data storage.
For its sale, we have prepared a kit consisting in one “Speed Control Trainer” combined with three “Speed Controls”. Upon the request of the client, we can also increase or reduce the number of “Speed Controls”.
Each “Speed Control” can be easily programmed by the athlete with their name.
Names, times, temperature and speed data is divided by athlete on the “Speed Control Trainer” display.
All data can be downloaded on to a PC.
Dedicated software for the analysis of data (snow conditions, type of crystal, last snowfall, humidity, etc) collected during the test, creating a complete “database” that can be updated and viewed at any time.